
Welcome back to the Blightmare dev blog, we're happy to have you! Today's post is the reveal of how well the terrain loading optimizations from last week ended up performing. Spoilers: it's pretty good.
First a little recap:
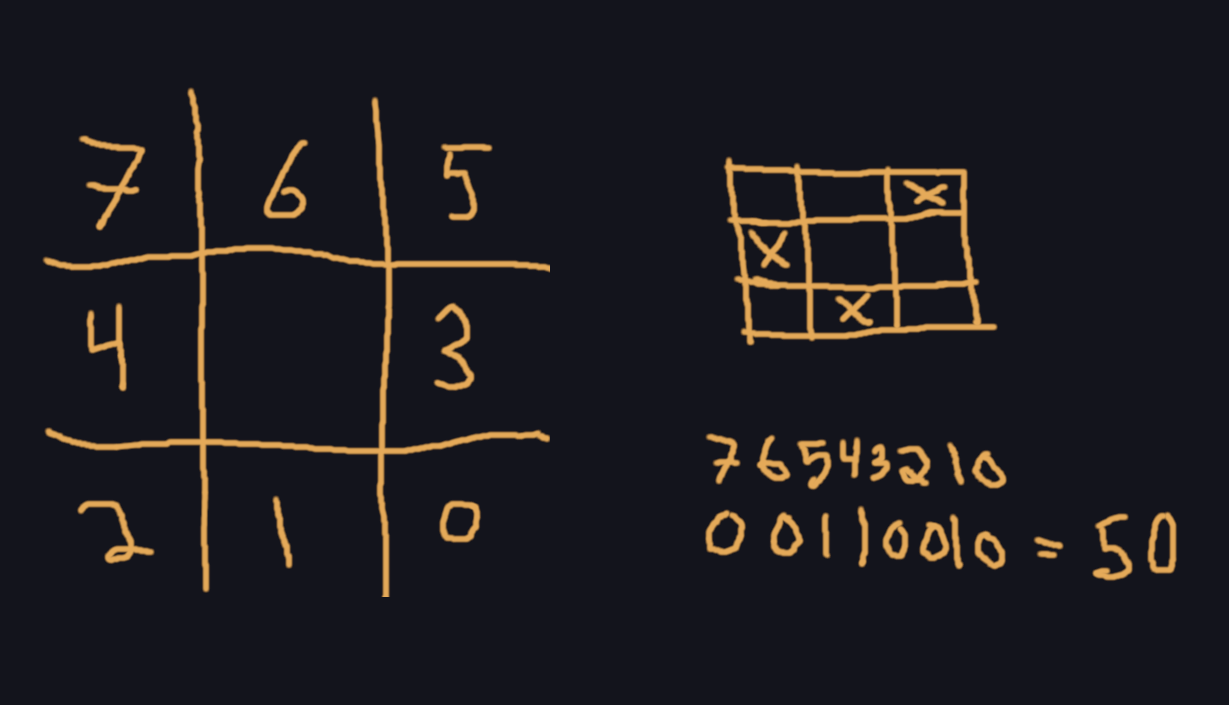
The terrain tiling rules that we use depend on the 8 adjacent tiles in order to determine which tile sprite should be used for any given tile. We use a bitflag scheme to encode a particular arrangement into a number between 0 and 255. The scheme works by using a 1 if an adjacent tile is present or a 0 if it is not. For our implementation, we start at the bottom right for bit 0 and end in the top left for bit 7. Hopefully this picture helps explain how this works:
  "TerrainTiles": [
    {
      "x": 1,
      "y": -100
    },
    {
      "x": 1,
      "y": -99
    },
    {
      "x": 1,
      "y": -98
    },
    {
      "x": 1,
      "y": -97
    },
    {
      "x": 1,
      "y": -96
    },
    {
      "x": 1,
      "y": -95
    },
    ...
}
This is really straightforward. It's just a big list of x, y coordinates. It's pretty inefficient however because of all the extra JSON syntax to wrap up our point in an object with property names. It also doesn't have enough information as previously mentioned. The new format will fix both of these problems. Since we want to store a "tile id" with each location, it would be nice if we could specify each location with its id as an object ("location": id). In order to do this, we will have to come up with some way to store the x and y location of the tile in a single value. One option is to do something like "{5, 4}". This could then be parsed out at load time and we would be on our way. However, if we ever want to move to a binary format where we aren't limited to strings as keys, we might want to be a little more clever with how the position is encoded. The solution we went with is another bit packing scheme. In particular, we have decided that tile locations will never be outside the range (-32768, 32767). This is the range of a 16 bit signed integer. With this limitation we can then store both the x and y locations in a single 32 bit integer. This is done by putting the 16 bits of x in the top half, and the 16 bits of y in the bottom half. The only tricky bit (hah!) here is being careful to remember if the value we're encoding was originally positive or negative. This can be tricky if we unpack the values into full 32 bit integers and aren't careful to preserve the sign bit. Instead of doing this however, we can use a trick to encode the value as always a positive number in the range (0, 65535). We do this with the formula:
public override int CombinePosition(int x, int y)
{
    int high = (x << 1) ^ (x >> 15);
    int low = (y << 1) ^ (y >> 15);

    return (high << 16) | low;
}
This creates a "zig zag" pattern with our values where positive numbers are doubled and negative values fill in the holes:
- -1 -> 1
- 1 -> 2
- -2 -> 3
- 2 -> 4
This fits the bill perfectly. Okay, so now that we have a single key for the position, we need a value that contains the tile mask - which tiles are around it - and which option within the options for that mask we should use. I went with something pretty simple here to pack these values together: the mask goes in the top 16 bits and the option in the bottom. This is significantly more "space" that we would need, and if the values were packed more compactly, we would be able to save some space, but that can be round 2. Putting this all together, we end up with level data that looks like this:
  "tiles": {
    "Ground": {
      "Dirt": {
        "12910594": 7012352,
        "12910596": 7012352,
        "12910598": 7012352,
        "12910600": 7012352,
        "12910602": 7012352,
        "12910604": 7012352,
        "12910606": 7012352,
        ...
      }
    }
  }
We're now in pretty good shape in terms of figuring out how the data will be stored in the level data. Let's move on to figuring out how the tile data will be configured. We need to store something for every possible tile. There's 256 options there and there are multiple tile sets that this needs to be done for, so the total number of things to be configured is really high. It was so high in fact that I decided to build a tool to automate the process (I am a programmer after all).
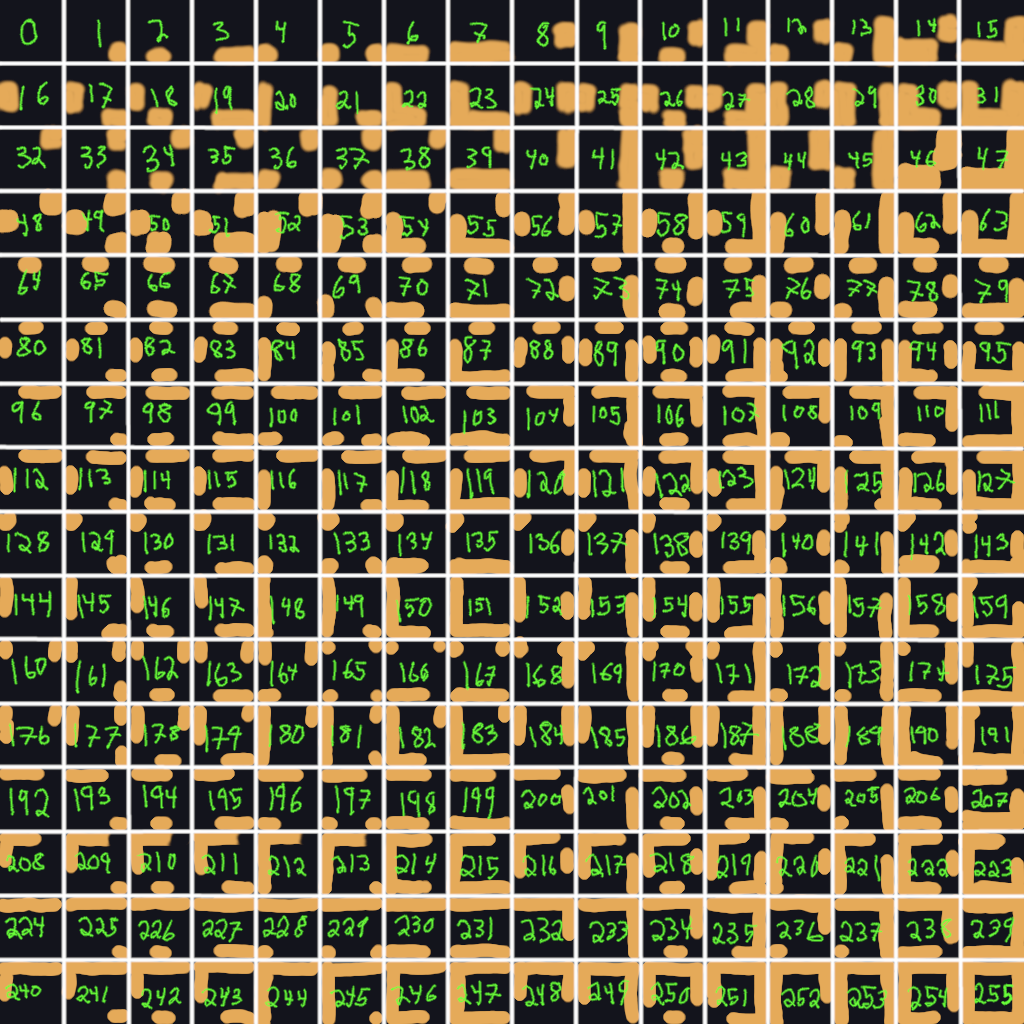
I started this process by building out a visual guide of what each mask value "looks" like:
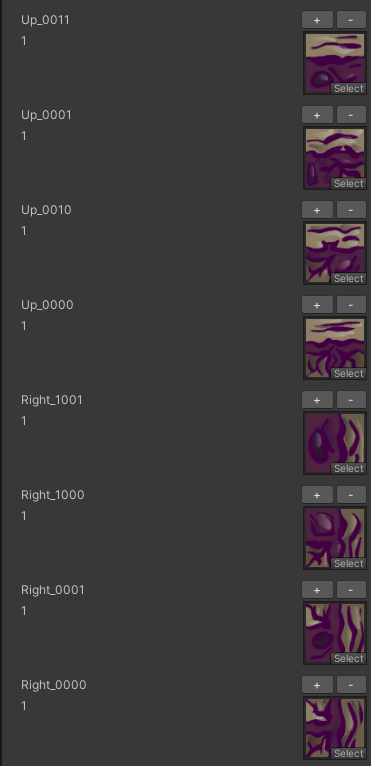
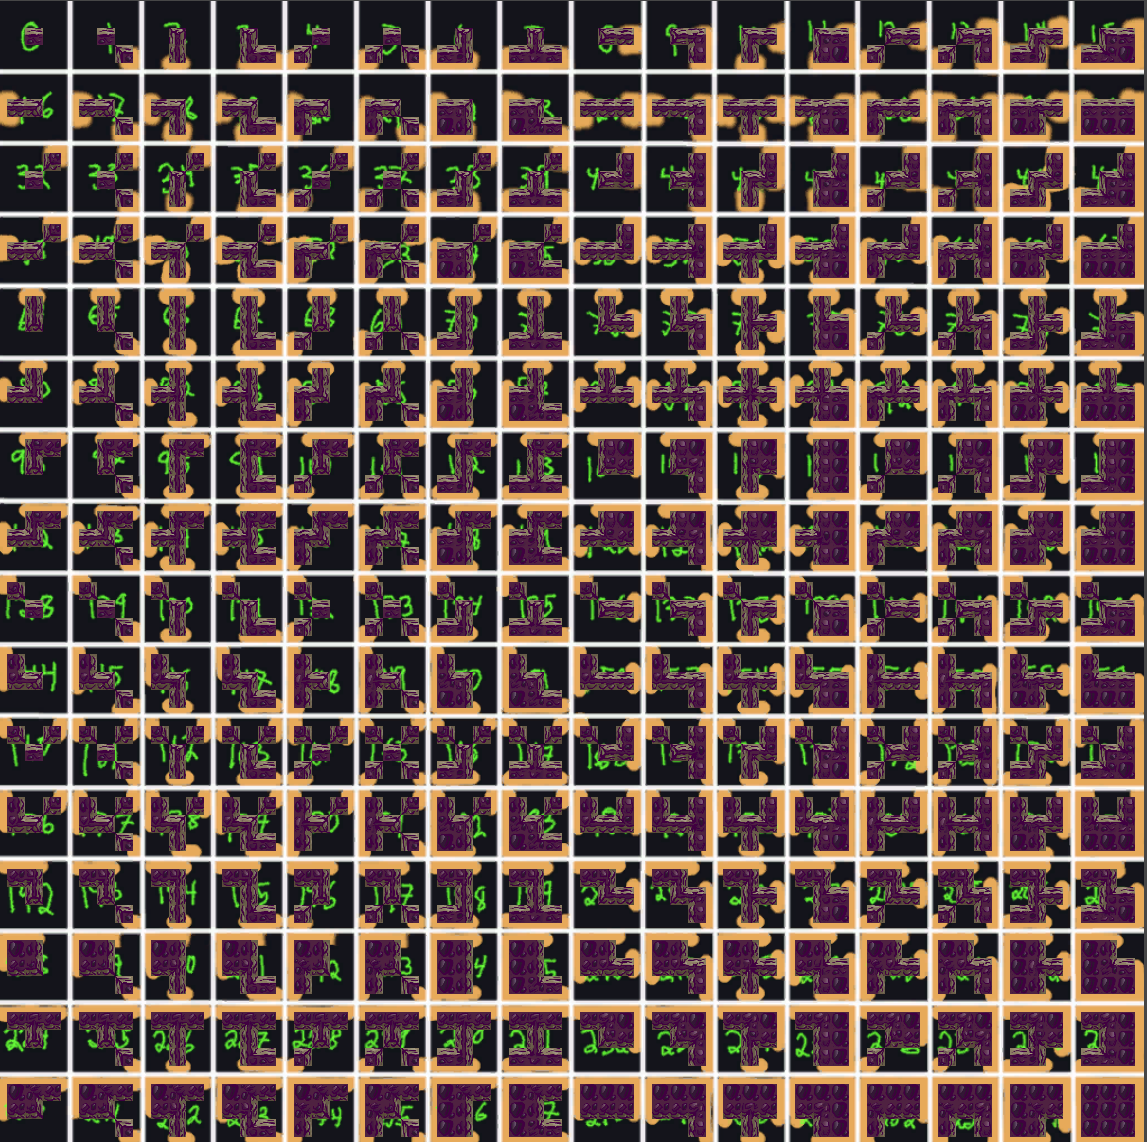
Next, I built a Unity scene that could actually run my tool code which generates assets, modifies assets, and saves assets. In order to make sure everything is working properly, the tool generates a preview that matches every mask value. This preview is then put on top of the hand-made visual guide, and the end result is something that makes it easy to verify and easy to correct any mistakes. When everything is setup, we get a picture like this:
Combining all of this together then, it's time to do a test to make sure things are actually loading faster. The test level that I whipped up has about 40,000 tiles on it. It looks like this:
I saved a version of the level in the old editor as well as the new editor and now for the moment of truth:
Original:
Level Load Bootstrap [5974 ms total]
    Init [5 ms]
    Parse Level Data [406 ms]
    Spawn Points [0 ms]
    Spike Tiles [1 ms]
    Terrain Tiles [4872 ms]
    Terrain Outline [160 ms]
    Simple Spawners [0 ms]
    Mechanics 1 [4 ms]
    Mechanics 2 [1 ms]
    Decorations [3 ms]
    Scripts/Level Start [87 ms]
New:
Level Load Bootstrap [811 ms total]
    Init [4 ms]
    Parse Level Data [140 ms]
    Spawn Points [0 ms]
    Spike Tiles [0 ms]
    Terrain Tiles [163 ms]
    Terrain Outline [0 ms]
    Simple Spawners [0 ms]
    Mechanics 1 [3 ms]
    Mechanics 2 [1 ms]
    Decorations [2 ms]
    Scripts/Level Start [73 ms]
Success! The "Terrain Tiles" section is the one we were targeting, and it's significantly faster. In this simple test, it looks like the new way is at least 20 times faster. That's a great start. If we decide to go further, we already know of some options, but for now this is very usable.
Thanks for reading to the end! Please head over to our Steam page and put Blightmare on your wishlist and pop over to our Twitter to follow for the latest updates. Have a great week!