
Hello there! Welcome back to another installment of the Blightmare dev blog. Today I’ll go into some detail about how we are implementing hidden areas within the levels of Blightmare. This is something that is very new, so the approach may change as we use it more, but this is what we have so far:
I’m going to walk through the process that ended up with the result above, starting with the test level and then building the feature in little pieces. Without further ado, here’s our little sandbox.
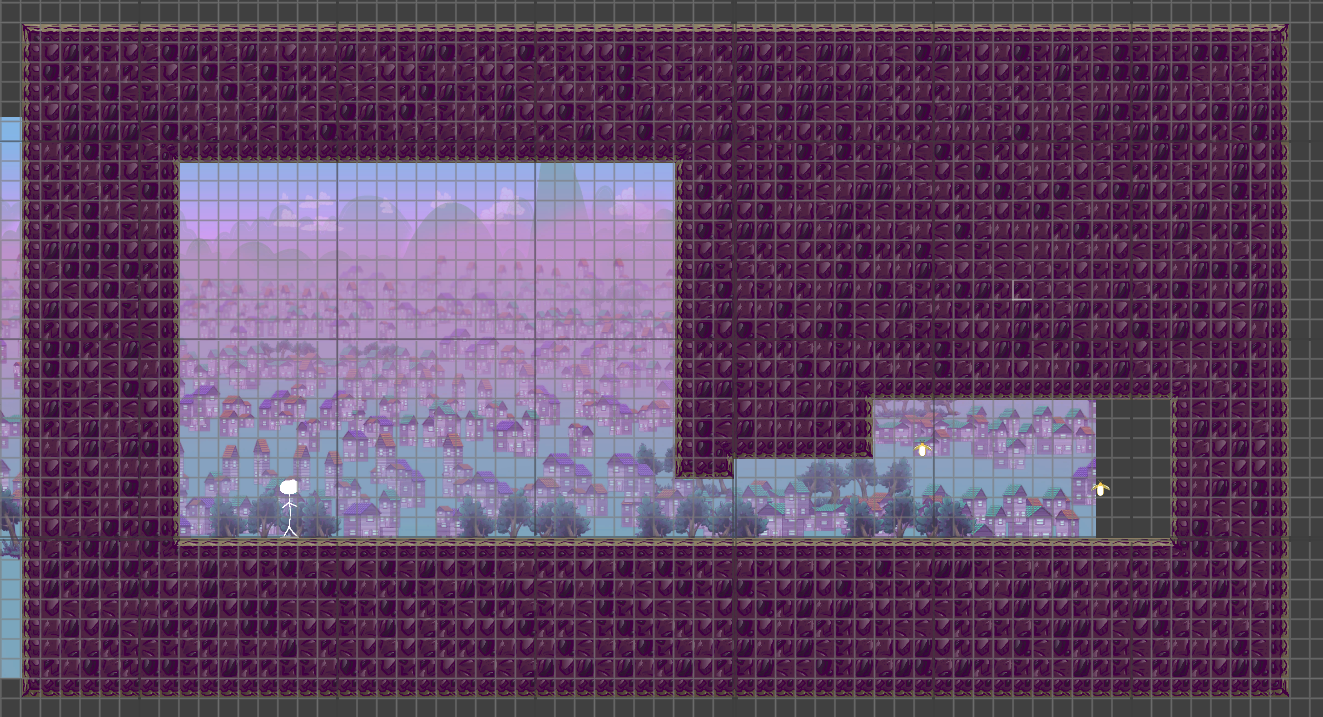 Not quite as hidden right now. Clearly there’s a lot of work to do!
The first step is actually hiding the area at all. There’s a couple of ways that this could be done:
- We could flag all the items in the area as being “hidden” and then also define some additional terrain set that needed to be shown.
- We could just add a new terrain layer “on top” of the existing one that covers up all the mechanics beneath it.
The first option is a lot of work to manage the individual visibility of the objects, and we would have to do something clever with collision detection to determine if the player was trying to “enter” the hidden area because terrain is solid by default. Not great.
The second option adds a new layer, but it otherwise reuses a lot of code that we already have. By using a new layer, we can disable collision on that layer to make it a purely visual effect and then everything pretty much Just Works.
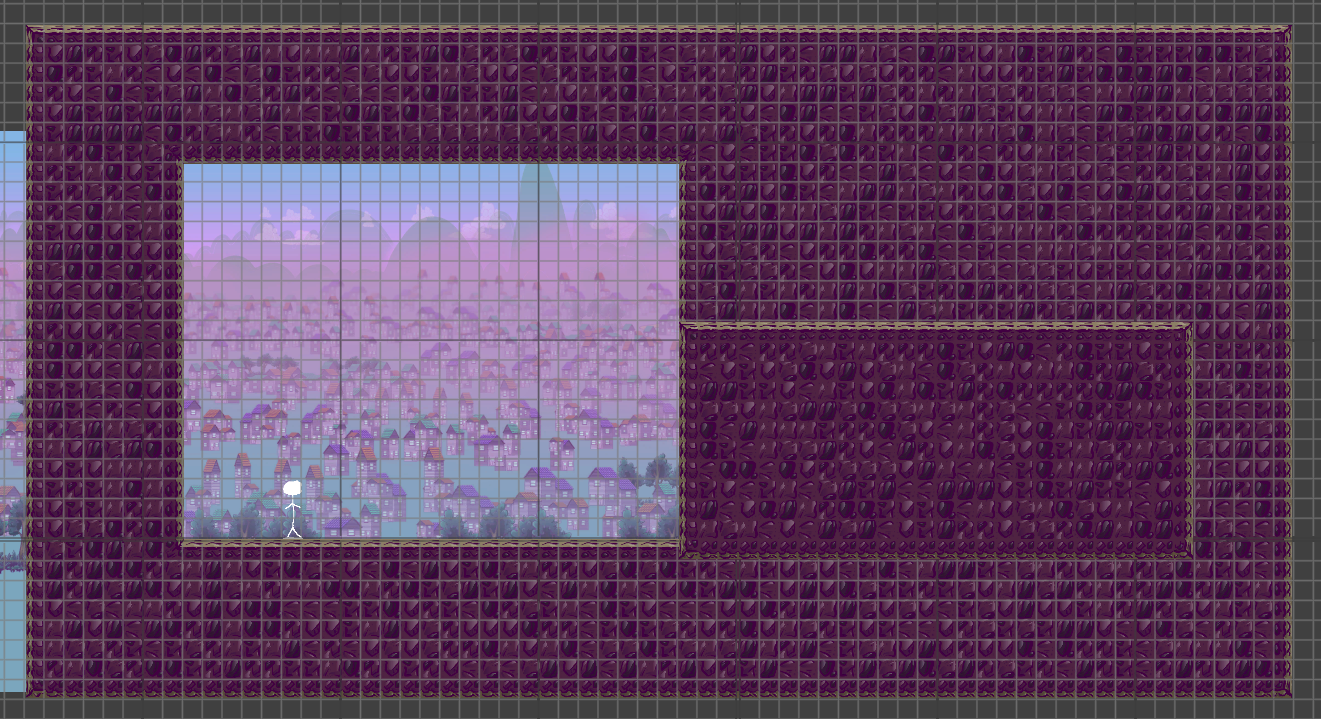
After adding a new layer to the editor and setting up the rest of the plumbing gets us here:

At least the area is hidden now. Obviously it’s not a very good secret area if you can see the lightbugs. That’s pretty easy to fix by changing the sorting order for this new terrain layer. Setting it to hide mechanics gets us here:
That’s looking a bit better. The seam around the terrain is a bit problematic, but this is still just the editor view and we do some additional processing when the game is running, so it would be a good idea to take a look at that too.
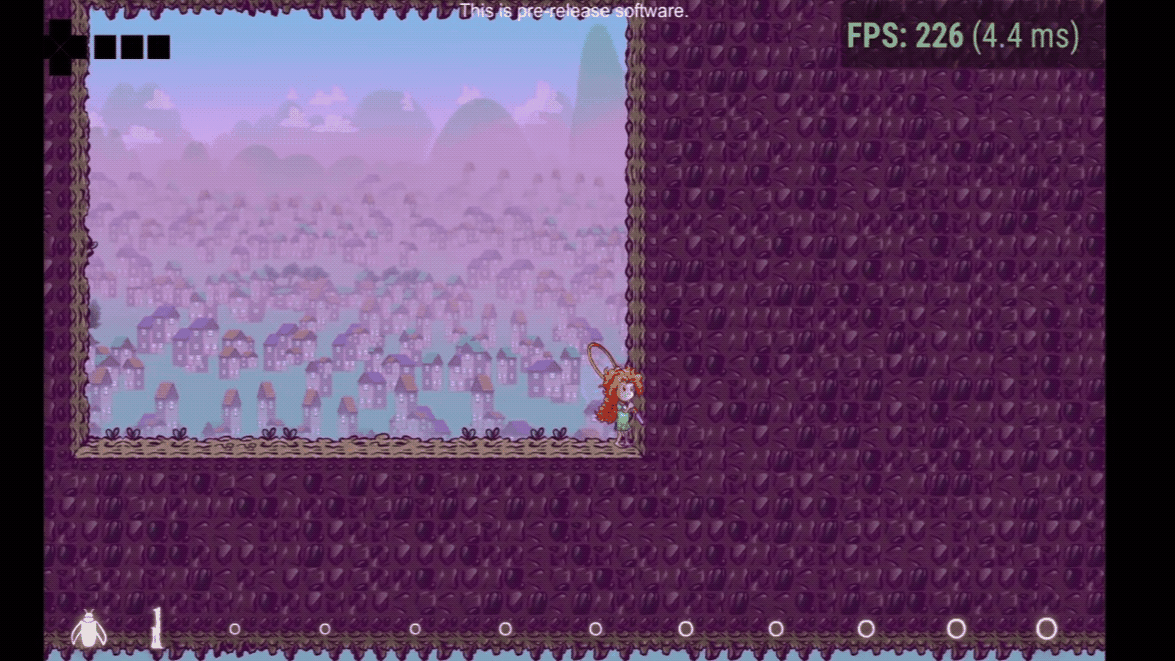
Dropping into the game shows that we can go into the hidden zone correctly, and even collect our light bugs. The terrain seams are problematic still though, for sure:

The little yellow bits are part of the lightbug particle effect that has escaped the blocking terrain.
Alrighty then, we’re definitely getting somewhere. I’m going to ignore the seam part for a moment and focus on revealing the area as the player explores it. It’s no fun just walking around without being able to see!
Like most things, there’s a few ways to go about this. The final effect at the top is actually the second way that I tried. In order to keep things brief, I won’t go into a lot of detail or background on the techniques here, but as we move further into the polish phase and focus on graphics effects, I’m sure there will be time to dig in.
The first way that I tried uses something called the stencil buffer. This is something that you can write to as part of a draw call and then through something called the stencil test you can tell subsequent draw calls to discard some of their fragments (kind of like pixels). In order to do this, I added circular geometry to Blissa and gave it a material that incremented the stencil buffer for fragments that it affected. By itself, this doesn’t do anything because none of the other materials are using the stencil buffer for anything. In order to actually get an effect, I changed the material of the top terrain layer to fail the stencil test if the value was more than 0. What this means is that any fragment in the top terrain layer that would be in the same screen location as a fragment of the circle attached to Blissa is skipped. This produces a very sharp cutout effect, as you can see here:

This is definitely an improvement from before, but there are a number of problems that make this approach hard to work with. Without going into all the details, it is pretty difficult to fade the edges of the cutout in a nice way, and this method can be difficult to combine with other effects because of the reliance on specific values in the stencil buffer, which is shared.
Moving on then to the second approach. Instead of using the stencil buffer, we can inject the position of the player into the shader that controls the top layer and use that to determine the alpha value of a given fragment. This makes it really easy to create a similar halo effect while also allowing for a fade at the edges essentially for free since we’re already computing how far away from the player we are in the shader. The algorithm is essentially this:
- Compute the distance to the player
- Use a function called smoothstep to compute the alpha value – this is a built-in function that gives a smooth value between 0 and 1 between given input values. In this case, we define a visibility radius and a fade distance and then use those to calculate the smoothstep boundaries.
- Multiply the computed alpha with the alpha of our terrain texture
- Combine with the R, G, and B channels of the terrain texture to produce a final color value
I decided to try out the new(ish) visual shader editor that comes with Unity to build this effect. I was quite impressed by how easy it was to use and it pretty much just worked the first time. If you’ve read this blog for a while, you may have picked up on some issues that I have with Unity in general, but this is not one of them. I also added a flag to indicate if we should be fading at all which is used to only enable the halo effect when the player is actually overlapping hidden terrain. All combined in Shader Graph, the effect looks like this:

After setting up the materials and writing a couple scripts to inject the data that we need into the material instances, everything was ready to go. The last part to solve was the seam around the top layer terrain where the tiles didn’t blend properly into the background terrain. The current way we do this is by allowing the top layer tiles to look at both top and bottom layers for neighboring tiles in order to determine which kind of tile they should be. I’m not totally convinced this is the best way to implement the fix, but it is at least a first pass that seems to work. We can iterate from there! Here’s a gif version of the final effect again:
And that’s all there is to it!
Thanks for reading and as always, please wishlist Blightmare on Steam and give us a follow on Twitter. Have a great day!